jpgHD Blog
Convert and restore film negatives with AI
A film negative reverses light and dark, and aged scans may also show a strong color cast, scratches, or stains. jpgHD can help turn a digitized negative into a viewable positive and improve damaged areas. Start with a clear scan and check the result against the original rather than treating AI reconstruction as an exact historical record.
Use only images you own or have permission to edit.
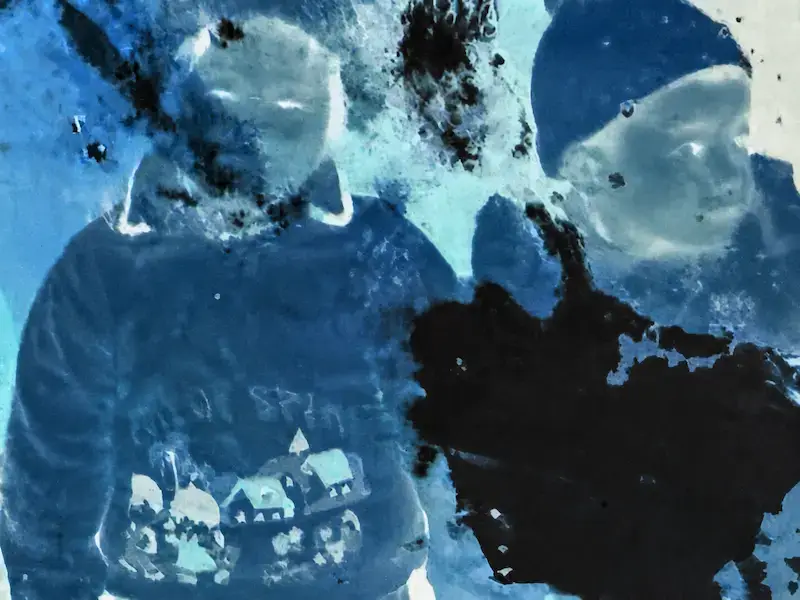 Before
 After
AfterNegative conversion is more than a simple inversion
A negative stores bright parts of a scene as dark areas and dark parts as light areas. Color negatives often have an orange mask; other digitized or inverted images may look blue or cyan. Converting to a positive restores a normal tonal relationship, while color correction deals with the cast and uneven fading.
The example above pairs a damaged, blue-toned negative of two children with the restored positive. Conversion makes the scene readable; restoration also improves the visible damage and portrait details. Results depend on the source, and heavily damaged areas may be reconstructed rather than recovered.
Prepare a useful digital scan
- Digitize the film first. Use a film scanner or photograph the frame with even backlighting and sharp focus. A phone photo of film on a table usually misses the transmitted detail. jpgHD processes the digital image, not the physical film.
- Work from one clear frame. Crop away the scanner interface, film borders, and neighboring frames without cutting into the scene. Avoid glare, clipped highlights, and heavy compression, and keep an untouched master scan.
- Check the scan polarity. If the scanning software already produced a normal positive, upload that version for restoration; do not invert it again. For an unconverted negative, keep the negative scan as your source.
Convert and restore the image in jpgHD
- Upload your scan. Open the jpgHD homepage and select the digital negative image. Keep the original scan separately so you can compare it later.
- Choose Ultra Restoration. Select the Ultra Restoration photo mode for this conversion and repair workflow, then start processing. There is no separate negative-conversion switch to enable.
- Review the positive. Check that light and dark areas look natural, then inspect skin tones, clothing, background colors, faces, and damaged regions at full size. Use an existing print or another scan as a color reference when available.
- Save and compare. Download the result and keep it alongside the original negative scan. If a face or color looks wrong, try a better scan rather than repeatedly enhancing the same generated output.
Preserve the memory without overstating the result
Simple color inversion does not remove scratches or restore a faded color balance. AI restoration can improve readability, but missing facial features, fine writing, and large damaged regions may be inferred from context. Always inspect those areas before printing or sharing.
A black-and-white negative can become a grayscale positive. Any added color is an interpretation, not proof of the original colors. For family archives, keep the film, the untouched digital scan, and the edited positive as separate versions.
Related articles
- How to restore old photos with AI
Learn how to restore old photos with jpgHD: prepare a scan, choose scratch repair or colorization, understand paid modes, and check restored faces.
- How to repair scratched and damaged photos
A practical guide to preparing scratched, creased, and damaged photos for AI repair with jpgHD.
Frequently asked questions
Can I upload a negative directly?
Yes, you can upload a digitized negative and use Ultra Restoration for conversion and repair. Scan or photograph the film with suitable backlighting first; the service does not scan physical film.
Why is my converted negative still orange or blue?
Inverting brightness alone may leave the film mask, fading, or scan-light color cast. Start with an evenly lit scan and review the color balance after processing. The original colors cannot always be determined precisely.
Can AI repair every scratch or missing detail?
No. Some visible damage can be improved, but areas with no usable information are reconstructed from context. Keep the original and verify faces and other meaningful details.
What if my scanner has already made a positive?
Upload the positive for restoration without inverting it again. Save the original scan and compare the restored version with the scanner output.