jpgHD Blog
How to restore old photos with AI
Old prints can be faded, low-resolution, or unevenly exposed. A careful AI restoration can make people and scenes easier to see without erasing their history.
Use only images you own or have permission to edit.
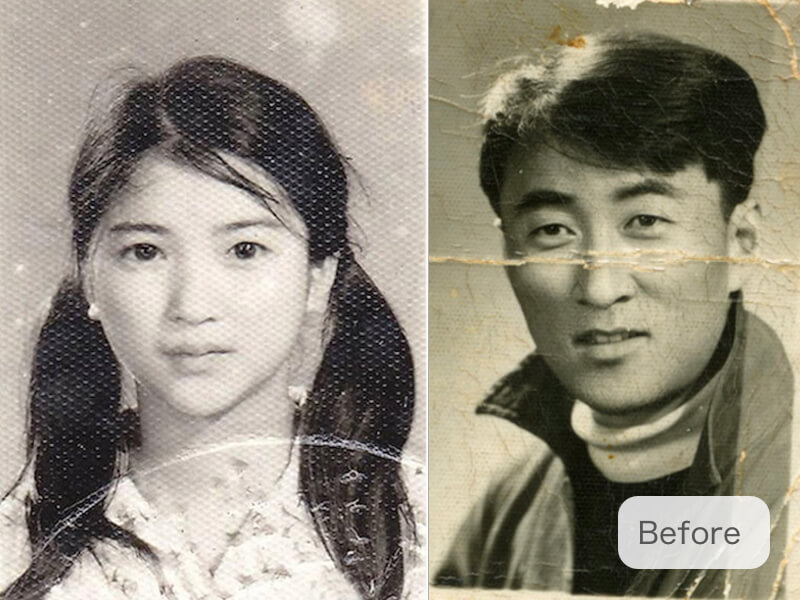 Before
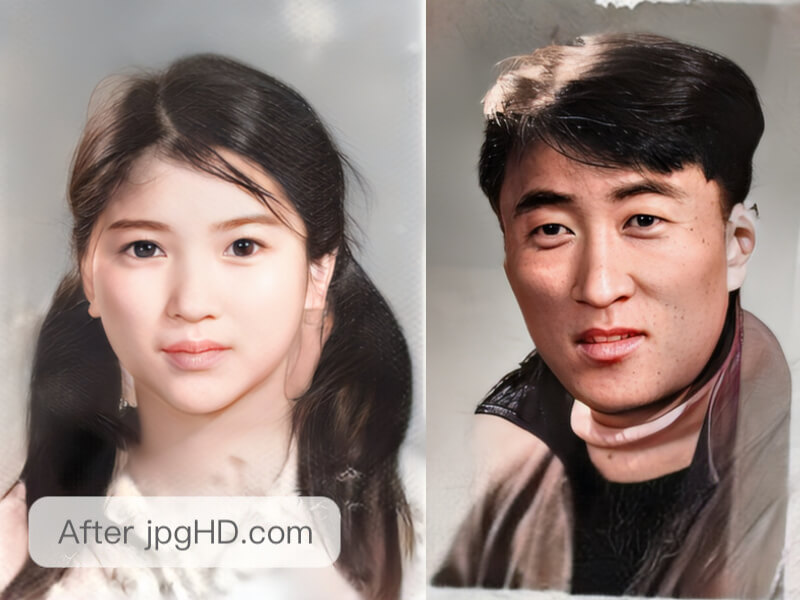 After
AfterWhy this workflow helps
Old prints can be faded, low-resolution, or unevenly exposed. A careful AI restoration can make people and scenes easier to see without erasing their history.
Scan the print as evenly as possible, keep the original scan, and review faces, clothing, and background details after enhancement.
Prepare a scan that preserves useful detail
Use a flatbed scan when one is available. If you photograph the print, keep the camera parallel to it, light it evenly, and move the light or camera until reflections disappear. Include the full photograph so important edges are not accidentally cut off.
Keep a copy of the untouched scan. Crop the surrounding table or scanner bed in a working copy, but avoid aggressive sharpening, smoothing, and repeated JPEG exports before restoration. Those edits can hide grain, fine lines, and the boundaries of real damage.
A practical jpgHD workflow
- Upload the original scan Choose your clean scan or camera copy with Select Images. Avoid a screenshot of the photograph when the original file is available.
- Choose a restoration mode For standard enhancement, select Portrait/Landscape. Enable Repair Scratched Photo only when the print has scratches or damage and you have paid credits. Ultra Restoration is a separate paid alternative.
- Set color and enlargement In standard mode, enable Colorize only if you want a color version of a black-and-white photo. Choose 2X or 4X for the output size; start with the size you need rather than the largest option.
- Check the cost and start Review the selected mode before pressing Start. Scratch repair and Ultra Restoration each use 3 credits per image. Wait for the task to finish before inspecting the output.
- Compare and keep both files Download the result and compare faces, hands, clothing, and damaged areas with the scan. Keep the original and label the enhanced version so later edits do not replace your source.
Tips for a more natural result
- Scan evenly first Capture the print with even light and retain the clean scan, since a better source gives jpgHD more visible information to improve.
- Keep the faded character Compare softened contrast with the original so restoration makes faces and clothing easier to see without erasing the photograph's history.
- Inspect damaged edges Look closely at torn borders, dust, and missing corners, where unique information may not have been captured clearly.
Choose enhancement, scratch repair, or Ultra Restoration
A faded or small photo without physical damage may only need standard Portrait/Landscape enhancement. This mode offers 2X and 4X enlargement, with optional Colorize. Increasing the output dimensions alone does not repair a tear.
Repair Scratched Photo is the paid option in the standard photo settings for visible damage. Ultra Restoration is a separate paid mode. Its settings differ from the standard mode: the 2X/4X and Colorize controls are not shown when Ultra Restoration is selected.
Basic enhancement is available within the free allowance shown on the pricing page. Scratch repair and Ultra Restoration require paid credits and each consume 3 credits for one image. Check your remaining credits and the selected settings before starting.
Check whether the restored photo still matches the original
Compare the result at the size where you will view or print it, then inspect important areas at full size. Look at eye shape, the mouth, hands, clothing patterns, lettering, and the edges of scratches. A sharper-looking feature can still be a reconstruction that differs from the photograph.
Colorization estimates colors from the visible scene; it cannot establish the original color of a uniform, dress, or building. Keep a black-and-white version when historical accuracy matters. If damage covers a face or an entire object, treat any reconstructed detail as an interpretation and retain the original scan alongside it.
Related articles
- How to repair scratched and damaged photos
A practical guide to preparing scratched, creased, and damaged photos for AI repair with jpgHD.
- How to enhance portraits and faces
Improve portrait clarity with jpgHD: prepare the image, protect natural features, and review faces at a useful size.
Frequently asked questions
Can I restore old photos for free?
You can try standard enhancement within the available free allowance. Repair Scratched Photo and Ultra Restoration are paid features; each uses 3 credits per image. Check the pricing page for the current allowance and upload limits.
Should I choose scratch repair or Ultra Restoration?
Use the standard photo mode with Repair Scratched Photo for a damaged print when you want its enlargement and optional colorization controls. Ultra Restoration is a separate paid mode. Judge the finished image against your scan; neither option guarantees an exact reconstruction of missing information.
Will Colorize recover the real original colors?
No. It estimates plausible colors. Leave it off to keep a black-and-white treatment, or retain both versions if you choose to colorize.
Can AI recover a face hidden by a tear?
AI may reconstruct a plausible face from the remaining context, but it cannot verify features that are absent from the scan. Compare with another original photograph if one exists and preserve the damaged source.
What should I keep after restoring a family photo?
Keep the untouched scan, the restored file, and a clear label identifying the edited version. Check that you have permission before publishing or sharing the photograph.